

These past few weeks have flown by, and although I've been baking (mainly to de-stress), I haven't had time to post in what feels like ages.
Hopefully everything has settled down now, so I should be able to get back to my usual schedule :)
In my new job I have many new food intolerances to deal with. I hate baking when I know someone can't eat any for example if they are gluten-intolerant. It so happens that to keep my team fed, I need to bake things that contain no gluten nor egg yolks. I love a challenge and to make a cake without these ingredients was a challenge. Eventually I worked out this recipe - a lemon syrup cake with strawberry jam and lemon buttercream. Super yum.
If you wanted the cake to be dairy free, use a soy (or other alternative yoghurt), and a non-dairy butter (ideally the firm blocks, not spread). For the buttercream, you may find you need more or less icing sugar, as it completely depends on the butter you use. You want the buttercream to be firm enough to not fall off a wooden spoon, but spreadable (to enable it to be piped).
To make the horizontal lines around the cake, you can simply use a fork to gently move around the buttercream.
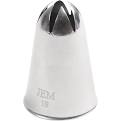
For the piping I used a closed tip large flower nozzle - see below:
The cake turned out really moist and soft, and was just as good (if not better) than lemon cakes I've made in the past that used normal flour and eggs!
Makes one 23cm cake
Ingredients:
For the cake:
- 300g margarine (dairy free if you want, I used Stork), plus extra for greasing the tins
- 200g caster sugar
- 100g soft brown sugar
- 1 tbsp vanilla extract
- 200g natural yoghurt (or dairy free alternative)
- 3 lemons
- 300g gluten-free plain flour (I used Dove's but other brands should work)
- 2 tbsp gluten free baking powder (I used Dove's)
- 1/2 tsp xantham gum
- 50g icing sugar
For the frosting:
- 200g good quality strawberry jam
- 200g softened butter (or dairy free alternative)
- 400g icing sugar, sifted
- 1-2 tbsp lemon juice
- yellow food colouring (I use a concentrated gel, where only a tiny amount is needed to colour the buttercream)
To finish:
- Handful of mini eggs
Method:
1. Preheat the oven to 190c (170c fan)/375f/gas mark 5. Grease the base and sides of two 23cm cake tins, and sprinkle flour over. Tap the tin to evenly distribute the flour in the tin and tip out the excess.
2. Beat the margarine until very soft, and add the caster and brown sugar. Beat until all of the sugar has been incorporated - make sure there are no clumps of brown sugar. The mixture will look light and fluffy in a few minutes.
3. Zest and juice 2 of the lemons and add both the zest and the juice to the bowl, together with the vanilla extract, yoghurt, gluten free plain flour and gluten free baking powder. Beat briefly until the mixture is smooth.
4. Pour the mixture evenly between the two cake tins and bake for 15-20 minutes, until the tops are lightly golden and a skewer inserted into the centre comes out clean.
5. Whilst the cake is baking, juice the remaining lemon and add to a saucepan with the 50g of icing sugar. Bring to the boil, and stir until all of the sugar has dissolved and the mixture has become clear.
6. Once the cake is out of the oven, prick the surface of each cake with a fork and use a pastry brush to evenly spread the lemon syrup over each cake. Allow the cakes to cool completely before frosting (this takes at least 30 minutes).
7. Make the buttercream. Have your butter as soft as possible, and beat with a wooden spoon until it is spreadable. Add half of the icing sugar with 1 tbsp of lemon juice and beat - the mixture will be very stiff. Once smooth, add the remaining icing sugar and lemon juice and continue beating until all of the icing sugar has been incorporated and if you taste a little, you can't taste any grains of sugar (or lumps of butter). The mixture should hold when you spoon a tablespoon out, but it shouldn't require too much strength to beat. This is hard to describe but to test, place a small amount of the buttercream into a piping bag and try piping the buttercream back into the bowl. If this requires a lot of force the buttercream is too stiff and needs a little more lemon juice (or milk if you don't want it so strong). If the mixture doesn't hold its shape once piped, it's too thin - to fix this add more icing sugar (but be sure to taste it to make sure it doesn't become too sweet).
8. Once the cakes have cooled turn out of the tins. If they have a significant dome, slice the tops off so they can be stacked. Place the first cake on a cake board. Spread the jam over the cake evenly.
9. Top with a third of the buttercream - you can pipe this on or just spread with a palette knife to the sides of the cake.
10. Top with the other cake layer. Take a large spoonful of buttercream and place on top of the cake. Use a palette knife to smooth around the top and sides of the cake a very thin layer of buttercream. This acts as a crumb coat and will give the cake a more professional finish. Place in the fridge for 20 minutes.
11. Take a third of the remaining buttercream and colour it a light yellow. Spread the uncoloured remaining buttercream over the top and sides of the cake. A long palette knife or a dough scraper works really well for this, but a flat knife will also work. Be patient and try to get an even layer on and around the whole cake. A good way to get a smooth edge is to place a large spoonful of buttercream on the side of the cake, then run a palette knife/dough scraper around the cake, essentially dragging the buttercream evenly across the cake. Any excess buttercream can then be used to patch up sections.
12. Drag a fork/line embosser around the sides of the cake to create the lines.
13. Place the large closed tip flower nozzle into a piping bag (I used a non-disposable one this time, but disposable bags also work very well). To pipe around the top of the cake, hold the bag vertically over the cake and press down to make a little domed peak. Then release a little pressure as you move the bag to create a little ribbon/leaf effect. Repeat around the cake.
14. To make the roses, again hold the piping nozzle vertically over where you want the centre of the rose to be. Start piping and then pipe in a swirl to the size of the rose. Repeat as desired.
15. Top with mini eggs, or cover the whole of the top of the cake with roses (you could do different colours of buttercream and make a bouquet of roses for example).
16. Enjoy!

No comments:
Post a Comment